

We have developed an open source webhook that rebuilds your Gatsby web application as soon as you publish content in Sanity. If you want to get started with the webhook right away, scroll to the end of the article.
At Humanoids we have recently been revamping our website. We use the Gatsby framework, which we have linked to a Content Management System (CMS) called Sanity. The CMS allows us to easily adjust content on our website and blog via the Sanity dashboard. Gatsby allows us to guarantee lightning-fast performance, because Gatsby generates static pages once that can be shown to the end user quickly.
So far so good. What's the catch?
The construction of static pages by Gatsby does not happen automatically when content is adjusted via our Sanity CMS. In addition, it is of course not desirable to have to manually start Gatsby with every content update to have our website rebuilt with the adjusted content. What was missing was an automated connection between our CMS and our Gatsby website, which would ensure that our website would automatically update when a CMS update took place. And what do we do at Humanoids when we discover that there is no existing solution for our digital problems - pardon me, challenges? Exactly yes: then we will build a solution ourselves!
The solution: a custom webhook
The essence of our challenge was to (1) notify our Gatsby website as soon as an update took place in our CMS, and (2) have Gatsby retrieve the adjusted content in our CMS and process it into a freshly adapted Humanoids.nl website.
We quickly found a starting point for the first part of this challenge with the Sanity CMS. Sanity offers the option to make a POST request to a webhook. The user can specify an HTTP endpoint to Sanity, so that Sanity then sends a POST request to this address as soon as something changes to the content in the CMS. This option offered hope, but it brought us to the next challenge: how do we ensure that we continuously listen for a Sanity signal on a specific HTTP endpoint, and then forward it to our Gatsby website?
How the webhook works?
To host the webhook, we use an Express Server in Node.js that is uploaded to an HTTP endpoint via our hosting, DigitalOcean, using Dockerfiles and Kubernetes. That's quite a mouthful of jargon that we have already written about in this article. Don't panic if you don't know how to place these words right away, it is not important to know for using the webhook.
As soon as the Sanity POST request arrives in our webhook, we first check whether the correct 'path parameters' have been sent from Sanity in the POST request. The function of this is that malicious individuals cannot simply trigger rebuilds of our Gatsby website by activating this webhook. When the correct path parameters have been sent to our webhook, authentication is complete and the webhook sends a POST request, including authorized GitHub token in the header, to the GitHub repository containing our Gatsby website source code.
const response = await fetch(`https://api.github.com/repos/${HUM_GITHUB_ORGANIZATION}/${HUM_GITHUB_REPOSITORY}/dispatches`,{method: 'POST',headers: {Authorization: `Bearer ${HUM_GITHUB_TOKEN}`,'Content-Type': 'application/json'},body: JSON.stringify({event_type: `${dataset}_build`})});
Build with GitHub Actions
As soon as the POST request from the webhook arrives at our GitHub repository, GitHub Actions fires an action called 'Repository Dispatch' which then triggers a new Gatsby build with the updated content from Sanity. In addition to this Gatsby build, we also use this trigger directly to put the Gatsby build online using Docker, Kubernetes and our hosting DigitalOcean.
Ok clear, how do I use this myself?
To use the webhook with your own Sanity and Gatsby setup, you need to host a webhook yourself and make it available on an HTTP endpoint.
You can get started immediately via the webhook image on Docker Hubs. You do need a Docker account for this.
It is important to note that the webhook runs on port 3000 and that various environment variables must be provided:
HUM_GITHUB_ORGANIZATION = # GitHub profielnaam of organisatieHUM_GITHUB_REPOSITORY = # RepositoryHUM_GITHUB_TOKEN = # Een GitHub token dat geautoriseerd is voor het triggeren van repository dispatch events in je repository naar wensHUM_SHARED_SECRET = # De path parameter die je toevoegt aan het eindpunt van je HTTP webhook
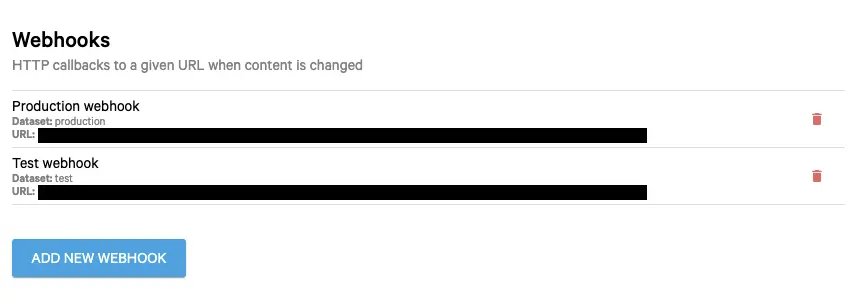
Finally, it is important that you include the HUM_SHARED_SECRET in your Sanity dashboard.
Host the webhook
There are all kinds of ways to host the webhook, we use GitHub Actions and a Kubernetes configuration on DigitalOcean.
If you also want to do this yourself via Kubernetes, the Kubernetes configuration below will come in handy. We start with the deployment.yaml. Here we define the environment variables and the reference to the image:
# ./kubernetes/deployment.yamlapiVersion: apps/v1kind: Deploymentmetadata:name: sanity-webhook-githubnamespace: productionlabels:app: sanity-webhook-githubspec:replicas: 2selector:matchLabels:app: sanity-webhook-githubtemplate:metadata:labels:app: sanity-webhook-githubspec:containers:- name: sanity-webhook-githubimage: humanoids/sanity-webhook-githubenv:- name : HUM_GITHUB_ORGANIZATIONvalueFrom:secretKeyRef:name: sanity-webhook-github-configkey: HUM_GITHUB_ORGANIZATION- name : HUM_GITHUB_REPOSITORYvalueFrom:secretKeyRef:name: sanity-webhook-github-configkey: HUM_GITHUB_REPOSITORY- name: HUM_SHARED_SECRETvalueFrom:secretKeyRef:name: sanity-webhook-github-configkey: HUM_SHARED_SECRET- name: HUM_GITHUB_TOKENvalueFrom:secretKeyRef:name: sanity-webhook-github-configkey: HUM_GITHUB_TOKENports:- containerPort: 3000imagePullPolicy: AlwaysimagePullSecrets:- name: registry
Then we call the deployment from the service:
# ./kubernetes/service.yamlapiVersion: v1kind: Servicemetadata:labels:app: sanity-webhook-githubname: sanity-webhook-githubnamespace: productionspec:ports:- port: 80protocol: TCPtargetPort: 3000selector:app: sanity-webhook-github
Before we apply these configurations, it is important to specify the environment variables as secrets:
kubectl create secret generic sanity-webhook-github-config--from-literal=HUM_GITHUB_ORGANIZATION=<HUM_GITHUB_ORGANIZATION>--from-literal=HUM_GITHUB_REPOSITORY=<HUM_GITHUB_REPOSITORY>--from-literal=HUM_SHARED_SECRET=<HUM_SHARED_SECRET>--from-literal=HUM_GITHUB_TOKEN=<HUM_GITHUB_TOKEN>--dry-run -n production -o yaml
And that was that: a change in the data in your Sanity CMS notifies your custom webhook. If your authorization check gives the green light, the webhook will trigger a GitHub Action in your GitHub repository of choice and you can go wild!
We have written an article about setting up a Kubernetes cluster on DigitalOcean if you want to learn more about this.