

When you start working with icons or vector illustrations in an application, you will want to work with the Scalable Vector Graphics (SVG) format.
In addition to a different screen size and resolution, different devices also have a different pixel density. And unlike .jpeg and .png formats, an SVG always remains sharp, no matter how you turn your iPhone or tablet.
Configure React Native
Unfortunately, you cannot show an SVG by default in React (Native). While there is support for this in web browsers, you have to download a package for React Native to achieve this. A commonly used package for this is react-native-svg.
Add react-native-svg to your project:
npm install react-native-svg
Link the native code for iOS:
cd ios && pod install && cd ..
Import SVG as file
When you work with icons, it saves time if you can use them plug-and-play in your project. For this we use a second package that takes care of this, namely: react-native-svg-transformer.
Add the package to your project:
yarn add --dev react-native-svg-transformer
Replace or supplement your current metro.config.js in the root of your project with the configuration below:
// config.metro.jsconst { getDefaultConfig } = require("metro-config");module.exports = () => {return {transformer: {babelTransformerPath: require.resolve("react-native-svg-transformer")},resolver: {assetExts: assetExts.filter(ext => ext !== "svg"),sourceExts: [...sourceExts, "svg"]}};};
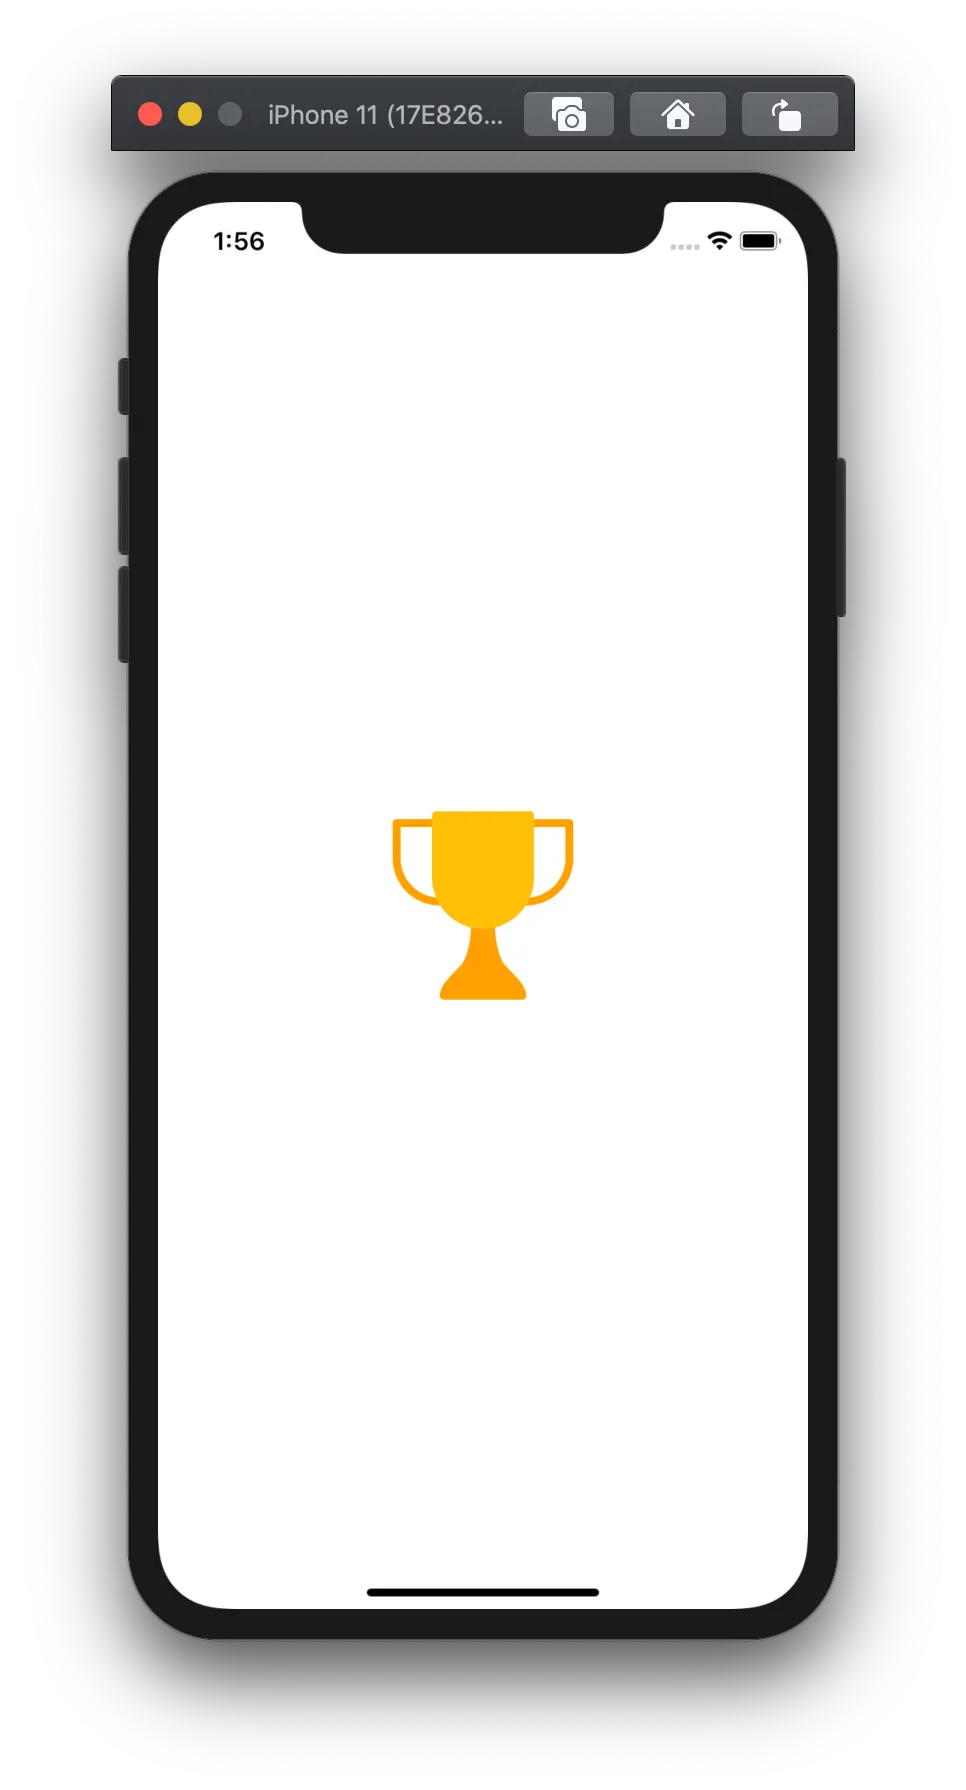
You can then import the icon directly into your code, just like any other React Component:
// app.jsimport React from 'react';import { View, StyleSheet } from 'react-native';import AwardIcon from './src/assets/icons/award.svg';const App = () => (<View style={styles.container}><AwardIcon /></View>);const styles = StyleSheet.create({container: {alignItems: 'center',justifyContent: 'center',flex: 1,}});export default App;
And as a result:
You can also provide properties directly. Don't forget to remove any properties from the SVG, as inline properties take priority over the properties that are sent.
// award.svg<svg version="1.1" x="0px" y="0px" viewBox="0 0 512 512"> … </svg><svg> … </svg>
The advantage of this is that you can use an icon with different sizes and colors with one file.
// app.jsconst App = () => (<View style={styles.container}><AwardIcon width="100%" height="100%" viewBox="0 0 512 512" fill="tomato"/></View>);
Use SVGs directly in your code
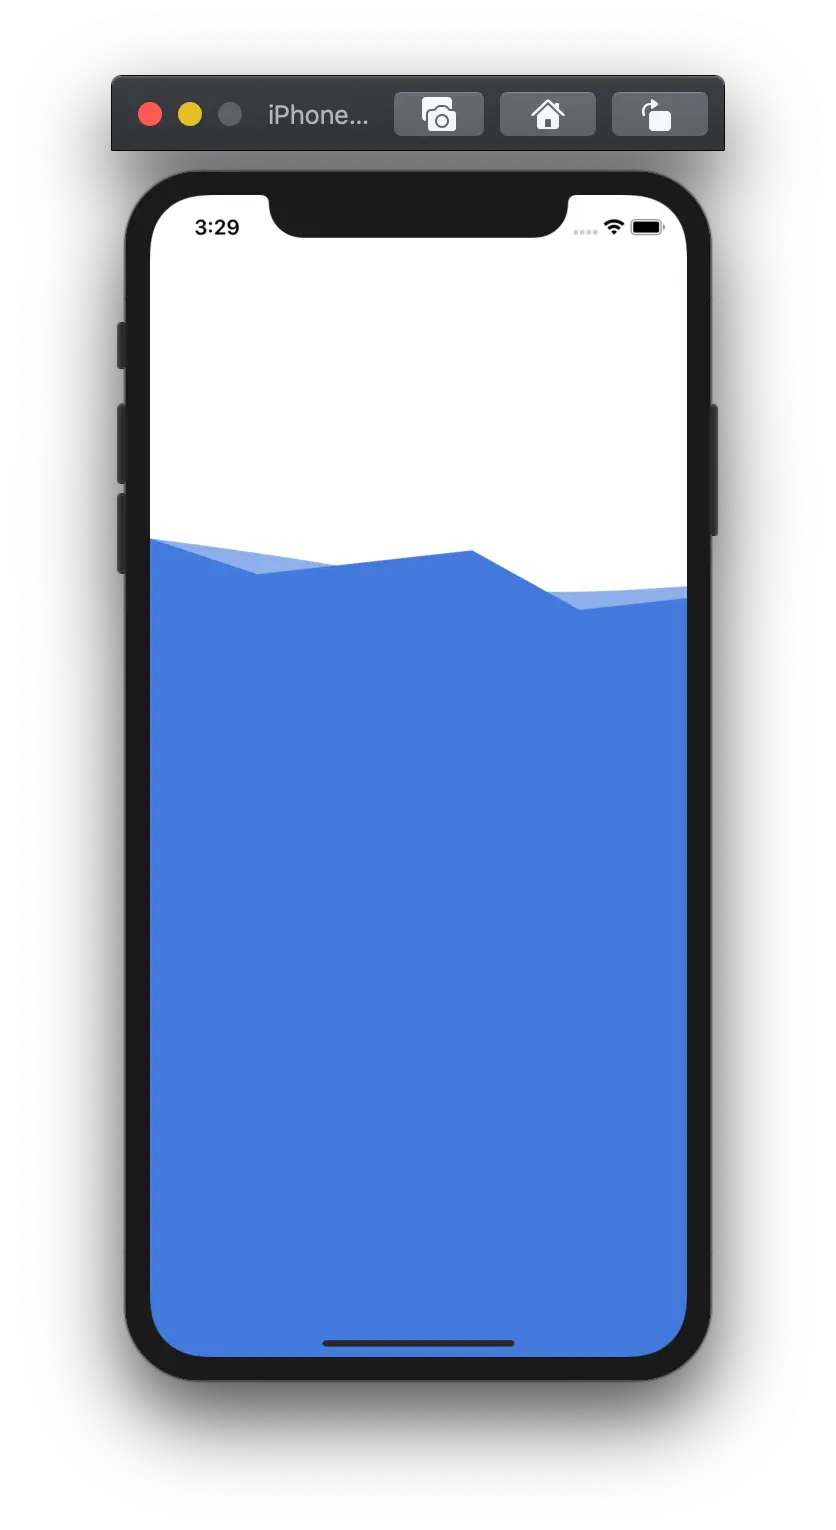
When dealing with more complex applications it can be useful to build an SVG using a function. This allows you to create a section divider with variations by using booleans to hide parts of the SVG. With this in mind, we will use the Get Waves tool to create a section divider and implement it as shown below. Please note:
- We give the viewBox the dimensions of the SVG to ensure that the content scales with the container.
- With the preserveAspectRatio property we adjust how the SVG relates to the viewbox. You can read more about the application on MDN.
// page-divider.jsimport React from 'react'import { View, StyleSheet } from 'react-native'import Svg, { G, Path } from 'react-native-svg'export const PageDivider = ({ hasExtraLayer = true, fill = "#4279DD" }) => (<><Svg width="100%" height="320" preserveAspectRatio="xMinYMax" viewBox="0 0 1440 320"><G {...{ fill }}>{hasExtraLayer &&<Path d="M0,128 L288,224 L576,192 L864,160 L1152,320 L1440,288 L1440,320 L1152,320 L864,320 L576,320 L288,320 L0,320Z" />}<Path fillOpacity="0.6" d="M0,128 L80,138.7C160,149,320,171,480,197.3C640,224,800,256,960,266.7 C1120,277, 1280,267, 1360,261.3 L1440,256 L1440,320 L1360,320 C1280,320,1120,320,960,320 C800,320, 640,320, 480,320 C320,320, 160,320, 80,320 L0,320 Z" /></G></Svg ><View style={styles.container} /></>)const styles = StyleSheet.create({container: {flex: 1,backgroundColor: "#4279DD",}})
And then we get:
Apply transformations
SVGs can also be used for illustrations where interaction is a requirement. For this we use the 'PanResponder' function of React Native. This feature recognizes single and multi-touch gestures that allow us to track where you touch the screen.
We will use this to adjust an SVG path in real time:
import React, { useState} from 'react'import { View, PanResponder } from 'react-native'import Svg, { Path } from 'react-native-svg'export const App = () => {const [lipHeight, setLipHeight] = useState(0)const responder = PanResponder.create({onStartShouldSetPanResponder: () => true,onPanResponderMove: (e, gestureState) => {setLipsHeight(gestureState.moveY)},})return (<View {...responder.panHandlers}><Svg width="100%" height="100%" ><Path stroke="#000" strokeWidth="20" strokeLinecap="round" d={`M110,480 Q200,${lipHeight} 300,480`}/></Svg ></View>)}
Resulting in:

To work
Finally, it is a good idea to run these implementations yourself to see if you understand everything correctly. Good luck!